Configuring realms
Once you have an administrative account for the Admin Console, you can configure realms. A realm is a space where you manage objects, including users, applications, roles, and groups. A user belongs to and logs into a realm. One Keycloak deployment can define, store, and manage as many realms as there is space for in the database.
Using the Admin Console
You configure realms and perform most administrative tasks in the Keycloak Admin Console.
-
You need an administrator account. See Creating the first administrator.
-
Go the the URL for the Admin Console.
For example, for localhost, use this URL: http://localhost:8080/admin/
Login page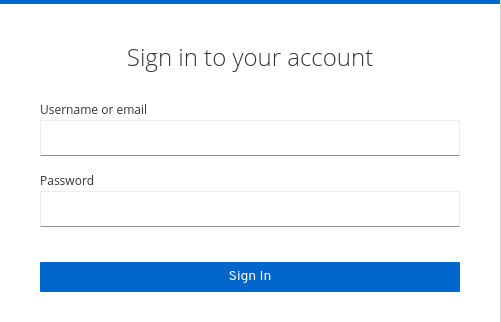
-
Enter the username and password you created on the Welcome Page or the
add-user-keycloakscript in the bin directory. This action displays the Admin Console.Admin Console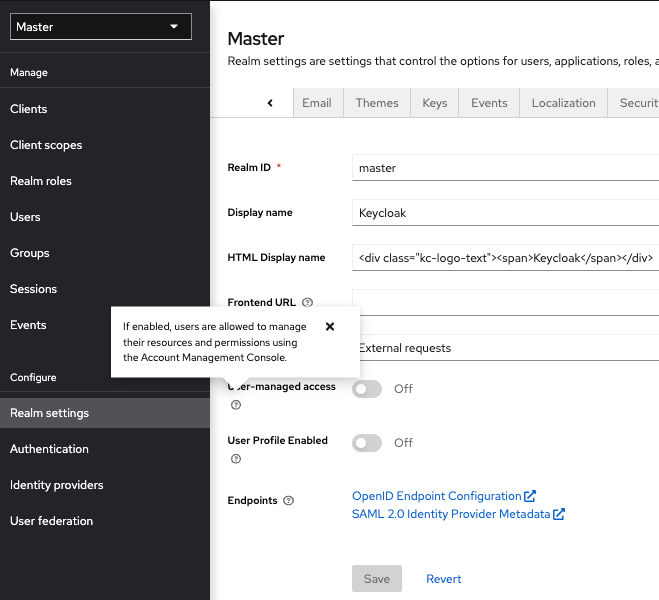
-
Note the menus and other options that you can use:
-
Click the menu labeled Master to pick a realm you want to manage or to create a new one.
-
Click the top right list to view your account or log out.
-
Click a question mark ? icon to show a tooltip text that describes that field. The image above shows the tooltip in action.
-
The master realm
In the Admin Console, two types of realms exist:
-
Master realm- This realm was created for you when you first started Keycloak. It contains the administrator account you created at the first login. Use the master realm only to create and manage the realms in your system. -
Other realms- These realms are created by the administrator in the master realm. In these realms, administrators manage the users in your organization and the applications they need. The applications are owned by the users.
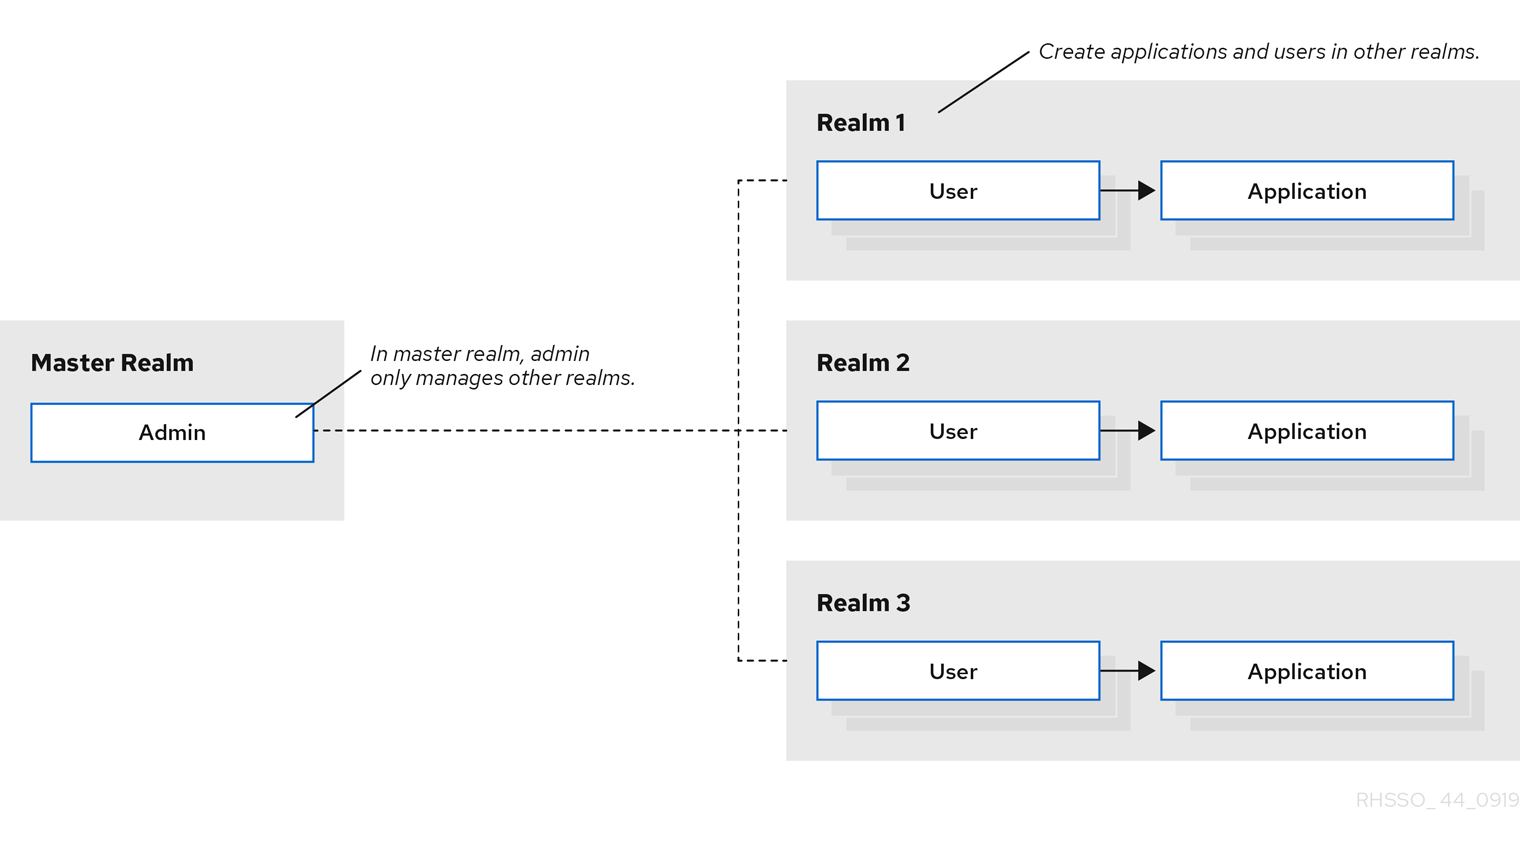
Realms are isolated from one another and can only manage and authenticate the users that they control. Following this security model helps prevent accidental changes and follows the tradition of permitting user accounts access to only those privileges and powers necessary for the successful completion of their current task.
-
See Dedicated Realm Admin Consoles if you want to disable the master realm and define administrator accounts within any new realm you create. Each realm has its own dedicated Admin Console that you can log into with local accounts.
Creating a realm
You create a realm to provide a management space where you can create users and give them permissions to use applications. At first login, you are typically in the master realm, the top-level realm from which you create other realms.
When deciding what realms you need, consider the kind of isolation you want to have for your users and applications. For example, you might create a realm for the employees of your company and a separate realm for your customers. Your employees would log into the employee realm and only be able to visit internal company applications. Customers would log into the customer realm and only be able to interact with customer-facing apps.
-
Point to the top of the left pane.
-
Click Create Realm.
Add realm menu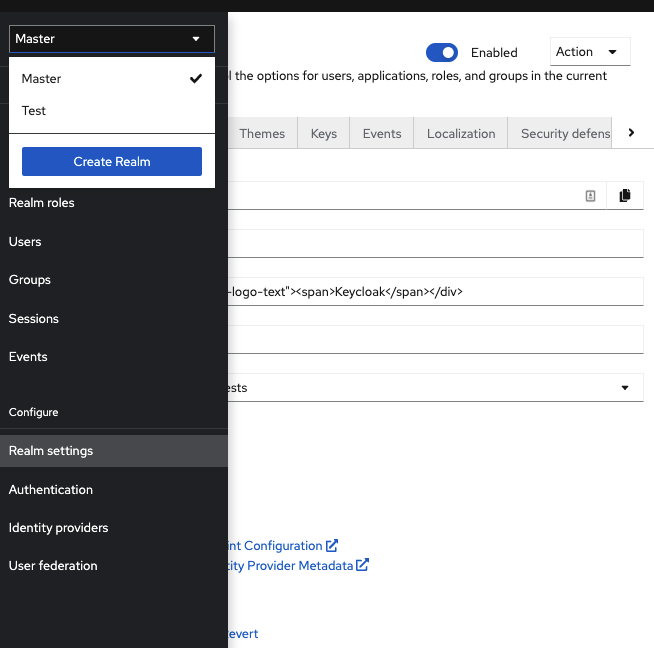
-
Enter a name for the realm.
-
Click Create.
Create realm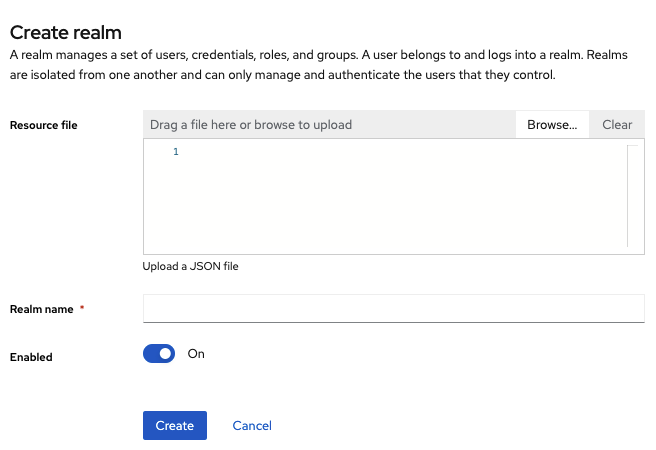
The current realm is now set to the realm you just created. You can switch between realms by clicking the realm name in the menu.
Configuring SSL for a realm
Each realm has an associated SSL Mode, which defines the SSL/HTTPS requirements for interacting with the realm. Browsers and applications that interact with the realm honor the SSL/HTTPS requirements defined by the SSL Mode or they cannot interact with the server.
-
Click Realm settings in the menu.
-
Click the General tab.
General tab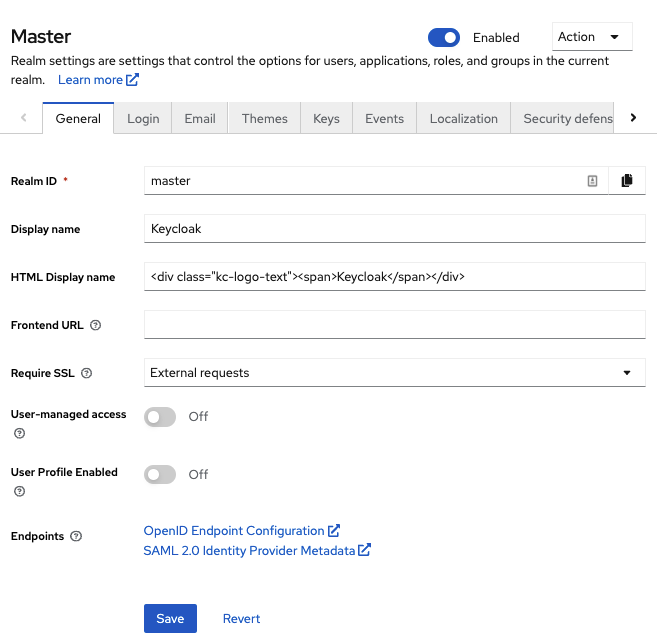
-
Set Require SSL to one of the following SSL modes:
-
External requests Users can interact with Keycloak without SSL so long as they stick to private IP addresses such as
localhost,127.0.0.1,10.x.x.x,192.168.x.x, and172.16.x.x. If you try to access Keycloak without SSL from a non-private IP address, you will get an error. -
None Keycloak does not require SSL. This choice applies only in development when you are experimenting and do not plan to support this deployment.
-
All requests Keycloak requires SSL for all IP addresses.
-
Configuring email for a realm
Keycloak sends emails to users to verify their email addresses, when they forget their passwords, or when an administrator needs to receive notifications about a server event. To enable Keycloak to send emails, you provide Keycloak with your SMTP server settings.
-
Click Realm settings in the menu.
-
Click the Email tab.
Email tab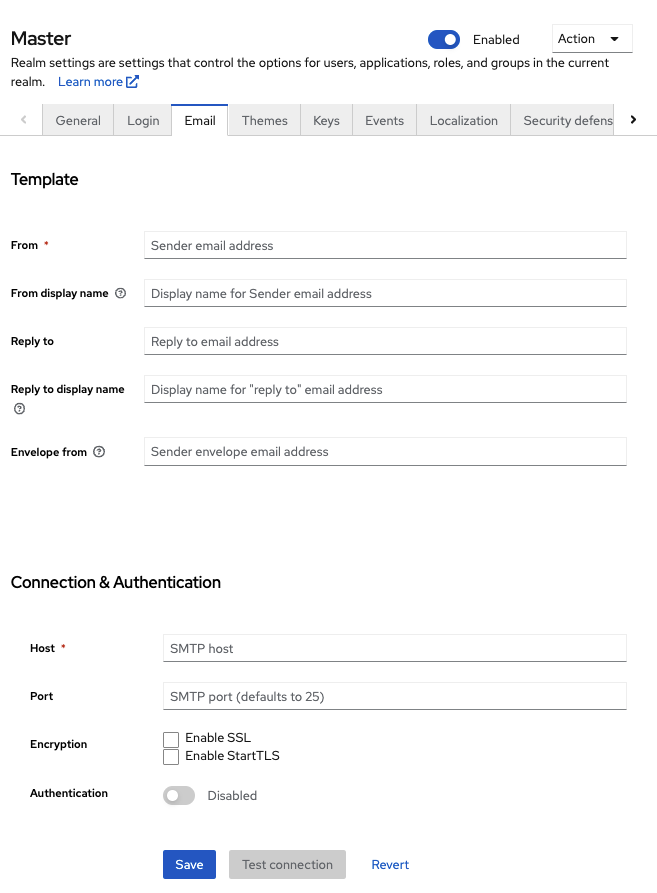
-
Fill in the fields and toggle the switches as needed.
- From
-
From denotes the address used for the From SMTP-Header for the emails sent.
- From display name
-
From display name allows to configure a user friendly email address aliases (optional). If not set the plain From email address will be displayed in email clients.
- Reply to
-
Reply to denotes the address used for the Reply-To SMTP-Header for the mails sent (optional). If not set the plain From email address will be used.
- Reply to display name
-
Reply to display name allows to configure a user friendly email address aliases (optional). If not set the plain Reply To email address will be displayed.
- Envelope from
-
Envelope from denotes the Bounce Address used for the Return-Path SMTP-Header for the mails sent (optional).
- Host
-
Host denotes the SMTP server hostname used for sending emails.
- Port
-
Port denotes the SMTP server port.
- Encryption
-
Tick one of these checkboxes to support sending emails for recovering usernames and passwords, especially if the SMTP server is on an external network. You will most likely need to change the Port to 465, the default port for SSL/TLS.
- Authentication
-
Set this switch to ON if your SMTP server requires authentication. When prompted, supply the Username and Password. The value of the Password field can refer a value from an external vault.
Configuring themes
For a given realm, you can change the appearance of any UI in Keycloak by using themes.
-
Click the Themes tab.
Themes tab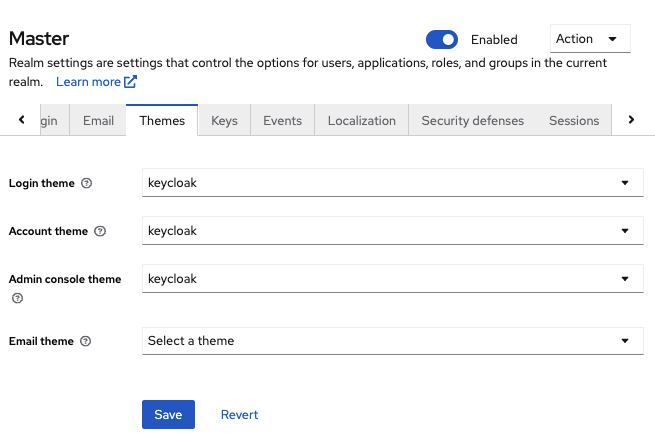
-
Pick the theme you want for each UI category and click Save.
- Login theme
-
Username password entry, OTP entry, new user registration, and other similar screens related to login.
- Account theme
-
Each user has an User Account Management UI.
- Admin console theme
-
The skin of the Keycloak Admin Console.
- Email theme
-
Whenever Keycloak has to send out an email, it uses templates defined in this theme to craft the email.
-
The Server Developer Guide describes how to create a new theme or modify existing ones.
Controlling login options
Keycloak includes several built-in login page features.
Enabling forgot password
If you enable Forgot password, users can reset their login credentials if they forget their passwords or lose their OTP generator.
-
Click Realm settings in the menu.
-
Click the Login tab.
Login tab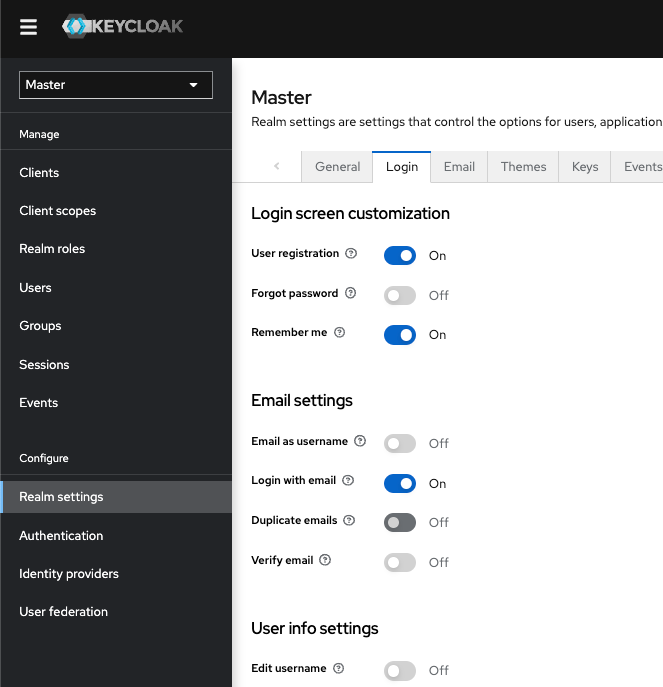
-
Toggle Forgot password to ON.
A
Forgot Password?link displays in your login pages.Forgot password link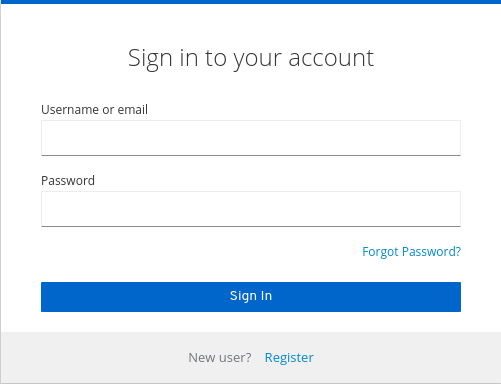
-
Click this link to bring users where they can enter their username or email address and receive an email with a link to reset their credentials.
Forgot password page
The text sent in the email is configurable. See Server Developer Guide for more information.
When users click the email link, Keycloak asks them to update their password, and if they have set up an OTP generator, Keycloak asks them to reconfigure the OTP generator. Depending on security requirements of your organization, you may not want users to reset their OTP generator through email.
To change this behavior, perform these steps:
-
Click Authentication in the menu.
-
Click the Flows tab.
-
Select the Reset Credentials flow.
Reset credentials flow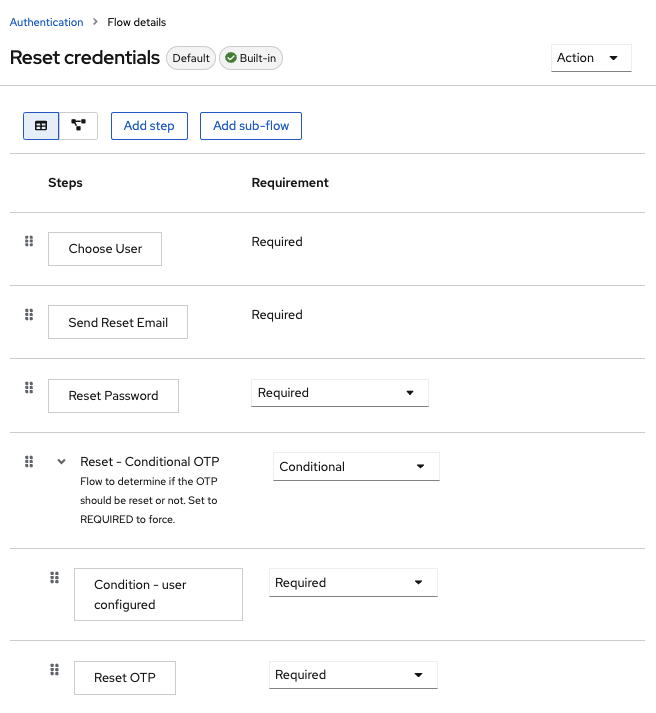
If you do not want to reset the OTP, set the
Reset OTPrequirement to Disabled. -
Click Authentication in the menu.
-
Click the Required actions tab.
-
Ensure Update Password is enabled.
Required Actions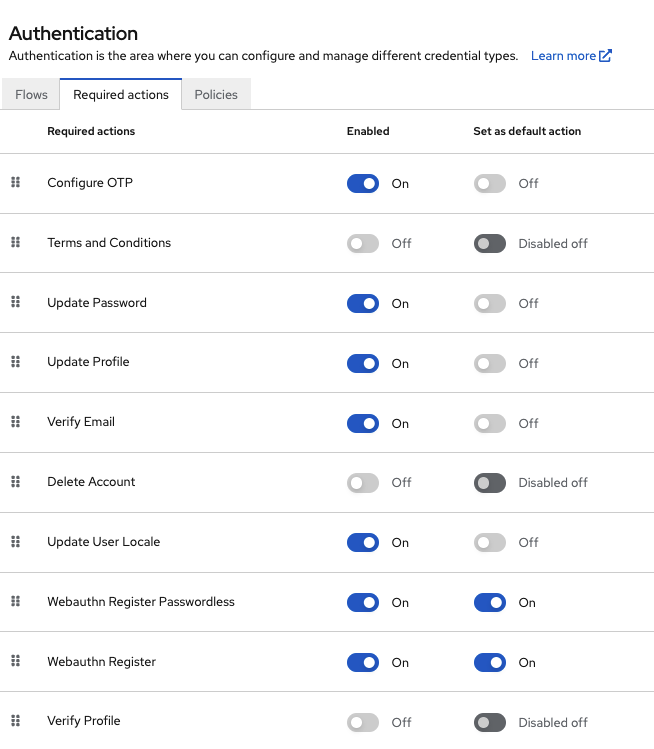
Enabling Remember Me
A logged-in user closing their browser destroys their session, and that user must log in again. You can set Keycloak to keep the user’s login session open if that user clicks the Remember Me checkbox upon login. This action turns the login cookie from a session-only cookie to a persistence cookie.
-
Click Realm settings in the menu.
-
Click the Login tab.
-
Toggle the Remember Me switch to On.
Login tab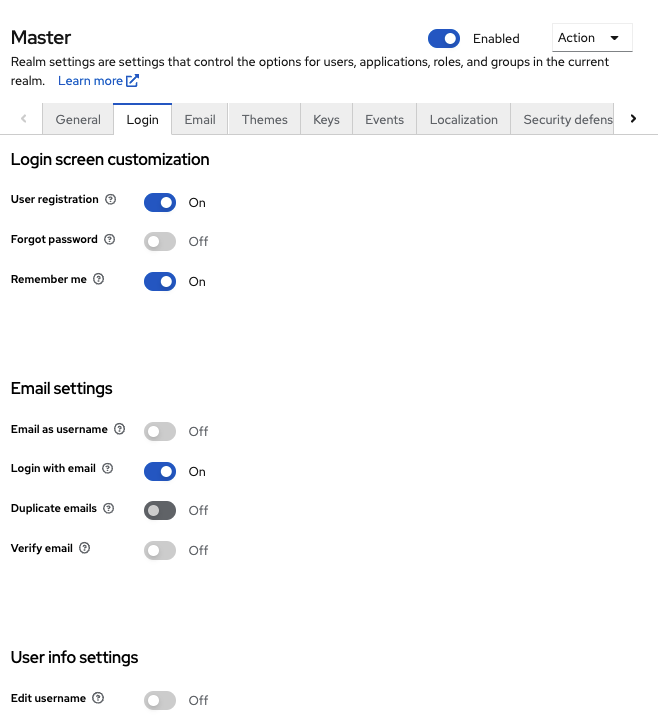
When you save this setting, a remember me checkbox displays on the realm’s login page.

ACR to Level of Authentication (LoA) Mapping
In the login settings of a realm, you can define which Authentication Context Class Reference (ACR) value is mapped to which Level of Authentication (LoA). The ACR can be any value, whereas the LoA must be numeric.
The acr claim can be requested in the claims or acr_values parameter sent in the OIDC request and it is also included in the access token and ID token. The mapped number is used in the authentication flow conditions.
Mapping can be also specified at the client level in case that particular client needs to use different values than realm. However, a best practice is to stick to realm mappings.

For further details see Step-up Authentication and the offical OIDC specification.
Update Email Workflow (UpdateEmail)
With this workflow, users will have to use an UPDATE_EMAIL action to change their own email address.
The action is associated with a single email input form. If the realm has email verification disabled, this action will allow to update the email without verification. If the realm has email verification enabled, the action will send an email update action token to the new email address without changing the account email. Only the action token triggering will complete the email update.
Applications are able to send their users to the email update form by leveraging UPDATE_EMAIL as an AIA (Application Initiated Action).
|
Please note that Update Email Workflow support is in development. Use this feature experimentally. |
|
If you enable this feature and you are migrating from a previous version, enable the Update Email required action in your realms. Otherwise, users cannot update their email addresses. |
Configuring realm keys
The authentication protocols that are used by Keycloak require cryptographic signatures and sometimes encryption. Keycloak uses asymmetric key pairs, a private and public key, to accomplish this.
Keycloak has a single active keypair at a time, but can have several passive keys as well. The active keypair is used to create new signatures, while the passive keypairs can be used to verify previous signatures. This makes it possible to regularly rotate the keys without any downtime or interruption to users.
When a realm is created a key pair and a self-signed certificate is automatically generated.
-
Click Realm settings in the menu.
-
Click Keys.
-
Select Passive keys from the filter dropdown to view passive keys.
-
Select Disabled keys from the filter dropdown to view disabled keys.
A keypair can have the status Active, but still not be selected as the currently active keypair for the realm.
The selected active pair which is used for signatures is selected based on the first key provider sorted by priority
that is able to provide an active keypair.
Rotating keys
We recommend that you regularly rotate keys. To do so, start by creating new keys with a higher priority than the existing active keys. Or create new keys with the same priority and making the previous keys passive.
Once new keys are available all new tokens and cookies will be signed with the new keys. When a user authenticates to an application the SSO cookie is updated with the new signature. When OpenID Connect tokens are refreshed new tokens are signed with the new keys. This means that over time all cookies and tokens will use the new keys and after a while the old keys can be removed.
The frequency of deleting old keys is a tradeoff between security and making sure all cookies and tokens are updated. Consider creating new keys every three to six months and deleting old keys one to two months after you create the new keys. If a user was inactive in the period between the new keys being added and the old keys being removed, that user will have to re-authenticate.
Rotating keys also applies to offline tokens. To make sure they are updated, the applications need to refresh the tokens before the old keys are removed.
Adding a generated keypair
-
Select the realm in the Admin Console.
-
Click Realm settings in the menu.
-
Click the Keys tab.
-
Click the Providers tab.
-
Click Add provider and select rsa-generated.
-
Enter a number in the Priority field. This number determines if the new key pair becomes the active key pair.
-
Select a value for AES Key size.
-
Click Save.
This action will generated a new keypair including a self-signed certificate.
Changing the priority for a provider will not cause the keys to be re-generated, but if you want to change the keysize you can edit the provider and new keys will be generated.
Adding an existing keypair and certificate
To add a keypair and certificate obtained elsewhere select Providers and choose rsa from the dropdown. You can change
the priority to make sure the new keypair becomes the active keypair.
-
A private key file. The file must be PEM formatted.
-
Select the realm in the Admin Console.
-
Click Realm settings.
-
Click the Keys tab.
-
Click the Providers tab.
-
Click Add provider and select rsa.
-
Enter a number in the Priority field. This number determines if the new key pair becomes the active key pair.
-
Click Browse… beside Private RSA Key to upload the private key file.
-
If you have a signed certificate for your private key, click Browse… beside X509 Certificate to upload the certificate file. Keycloak automatically generates a self-signed certificate if you do not upload a certificate.
-
Click Save.
Loading keys from a Java Keystore
To add a keypair and certificate stored in a Java Keystore file on the host select Providers and choose java-keystore
from the dropdown. You can change the priority to make sure the new keypair becomes the active keypair.
For the associated certificate chain to be loaded it must be imported to the Java Keystore file with the same Key Alias used to load the keypair.
-
Select the realm in the Admin Console.
-
Click Realm settings in the menu.
-
Click the Keys tab.
-
Click the Providers tab.
-
Click Add provider and select java-keystore.
-
Enter a number in the Priority field. This number determines if the new key pair becomes the active key pair.
-
Enter a value for Keystore.
-
Enter a value for Keystore Password.
-
Enter a value for Key Alias.
-
Enter a value for Key Password.
-
Click Save.
Making keys passive
-
Select the realm in the Admin Console.
-
Click Realm settings in the menu.
-
Click the Keys tab.
-
Click the Providers tab.
-
Click the provider of the key you want to make passive.
-
Toggle Active to Off.
-
Click Save.
Disabling keys
-
Select the realm in the Admin Console.
-
Click Realm settings in the menu.
-
Click the Keys tab.
-
Click the Providers tab.
-
Click the provider of the key you want to make passive.
-
Toggle Enabled to Off.
-
Click Save.
Compromised keys
Keycloak has the signing keys stored just locally and they are never shared with the client applications, users or other entities. However, if you think that your realm signing key was compromised, you should first generate new keypair as described above and then immediately remove the compromised keypair.
Alternatively, you can delete the provider from the Providers table.
-
Click Clients in the menu.
-
Click security-admin-console.
-
Scroll down to the Capability config section.
-
Fill in the Admin URL field.
-
Click the Advanced tab.
-
Click Set to now in the Revocation section.
-
Click Push.
Pushing the not-before policy ensures that client applications do not accept the existing tokens signed by the compromised key. The client application is forced to download new key pairs from Keycloak also so the tokens signed by the compromised key will be invalid.
|
REST and confidential clients must set Admin URL so Keycloak can send clients the pushed not-before policy request. |