-
Click Identity Providers in the menu.
-
From the
Add providerlist, selectFacebook. Keycloak displays the configuration page for the Facebook identity provider.Add identity provider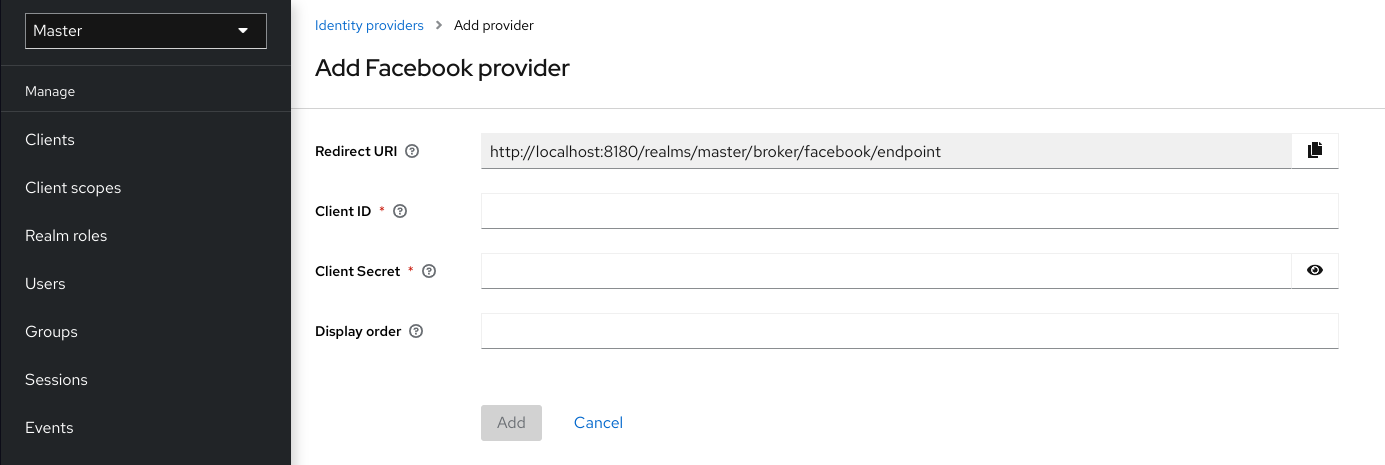
-
Copy the value of Redirect URI to your clipboard.
-
In a separate browser tab, follow the Facebook Developer Guide’s instructions to create a project and client in Facebook.
-
Ensure your app is a website-type app.
-
Enter the Redirect URI’s value into the
Site URLof the FacebookWebsitesettings block. -
Ensure the app is public.
-
-
Enter the
Client IDandClient Secretvalues from your Facebook app into theClient IDandClient Secretfields in Keycloak. -
Click Add
-
Enter the required scopes into the Default Scopes field. By default, Keycloak uses the
emailscope. See Graph API for more information about Facebook scopes.
Keycloak sends profile requests to graph.facebook.com/me?fields=id,name,email,first_name,last_name by default. The response contains the id, name, email, first_name, and last_name fields only. To fetch additional fields from the Facebook profile, add a corresponding scope and add the field name in the Additional user’s profile fields configuration option field.